1
Go to claude.ai and enter your email
Open your web browser and go to claude.ai. You will see the signup screen below. You can sign up with Google (if you have a Gmail account) or with any email address. Type your email into the box and click Continue with email.
Option 1: Sign in with Google
Option 2: Enter your email here
The claude.ai signup page — your starting point
Which option should I choose?
Either works perfectly. If you use Gmail, "Continue with Google" is the fastest — you skip the email verification step. If you use any other email, type it in the box. Both give you the same free account.
2
Check your email for a verification code
After entering your email, Claude sends a 6-digit verification code to your inbox. Check your email, find the message from Anthropic, and type the code into the box shown below.
Your email address will appear here
Type the 6-digit code from your email here
The verification screen — your email address appears where the blur is
Don't see the email?
Check your spam or junk folder first. If it's not there after 2 minutes, click "Try sending again" at the bottom of the screen. The email comes from Anthropic and has "Verify your email" in the subject line.
3
Agree to the terms and create your account
After verifying your email, you'll see the screen below. Tick the checkbox to agree to Anthropic's terms of service, then click Create account.
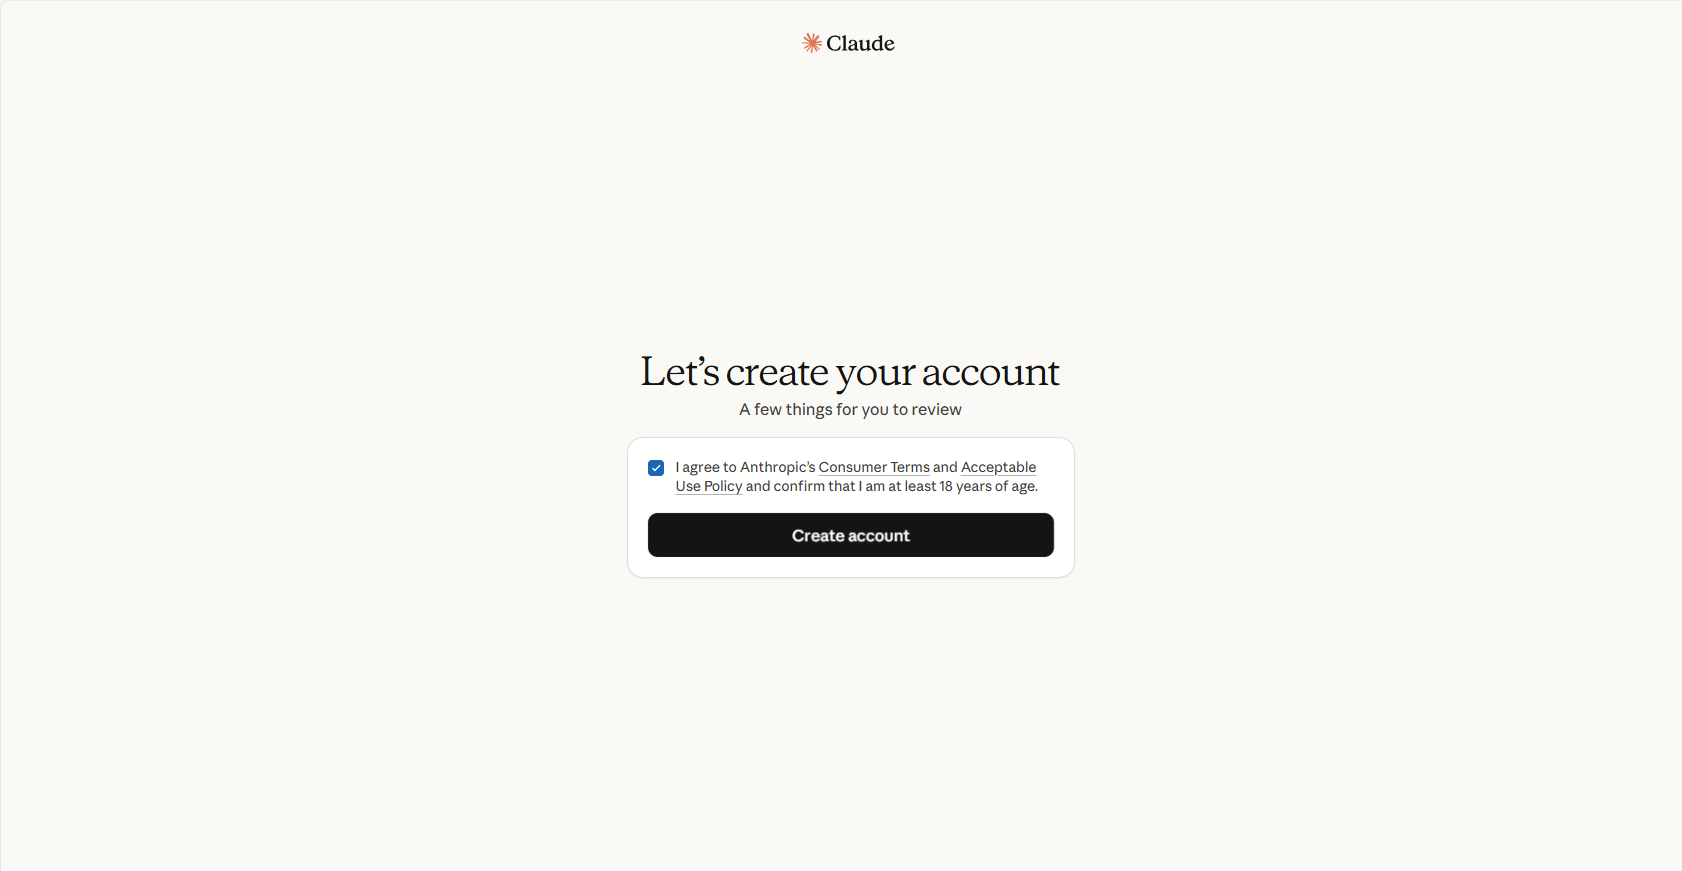
Tick this box first
Then click Create account
Tick the checkbox, then click Create account
4
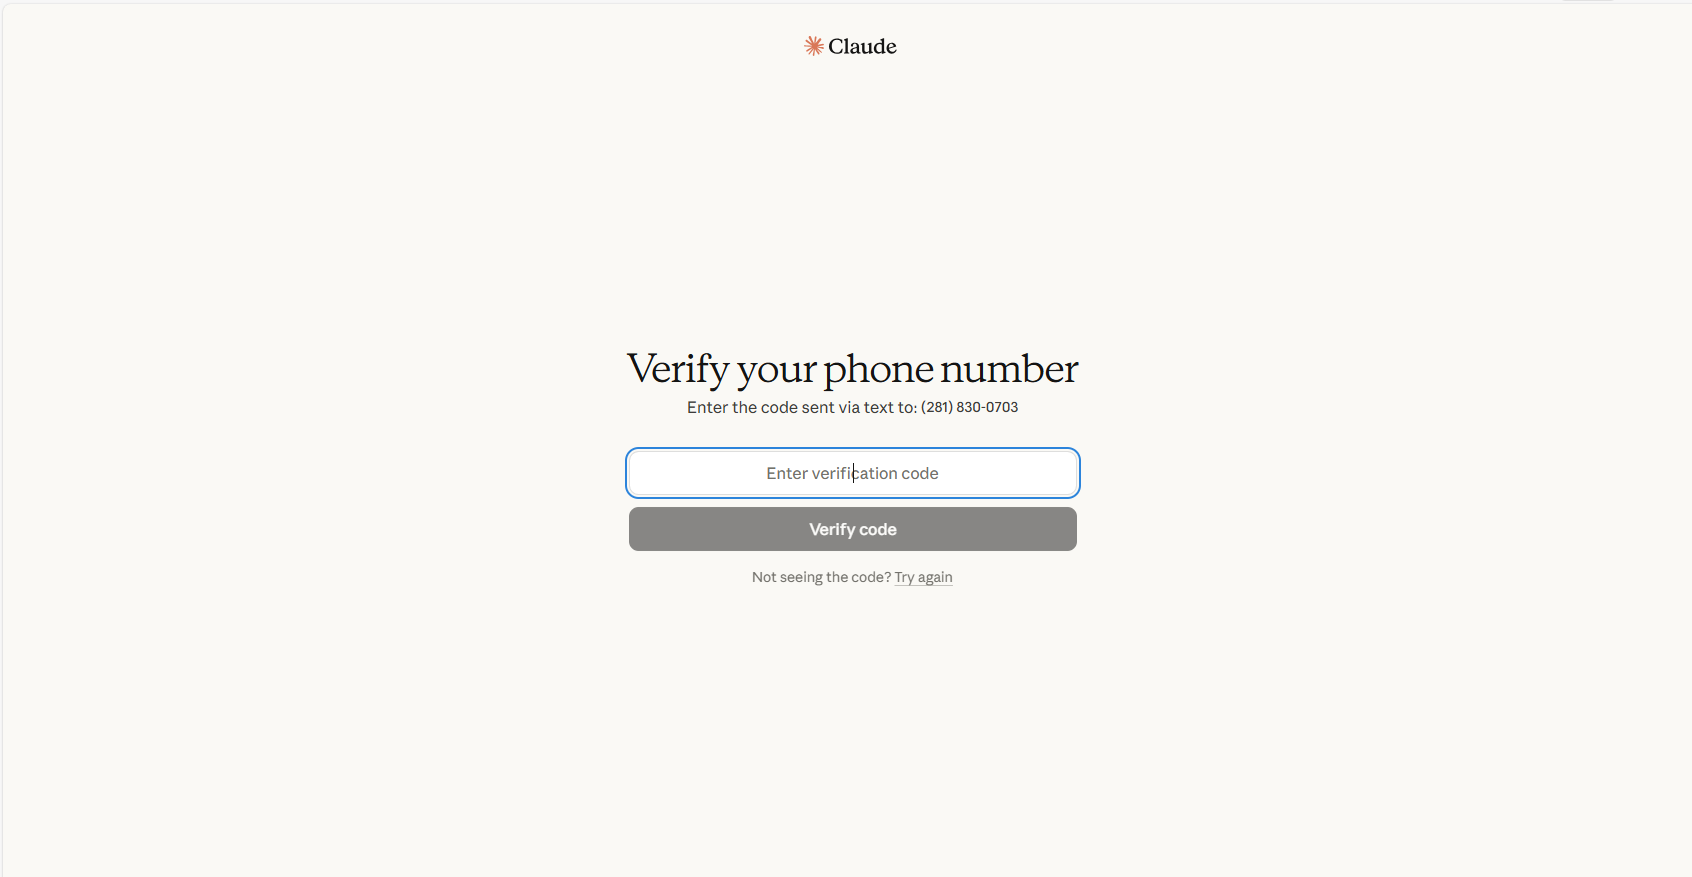
Verify your phone number
Anthropic asks for a phone number to prevent abuse. Enter your mobile number and click Send verification code. A text message with a 6-digit code will arrive within seconds.
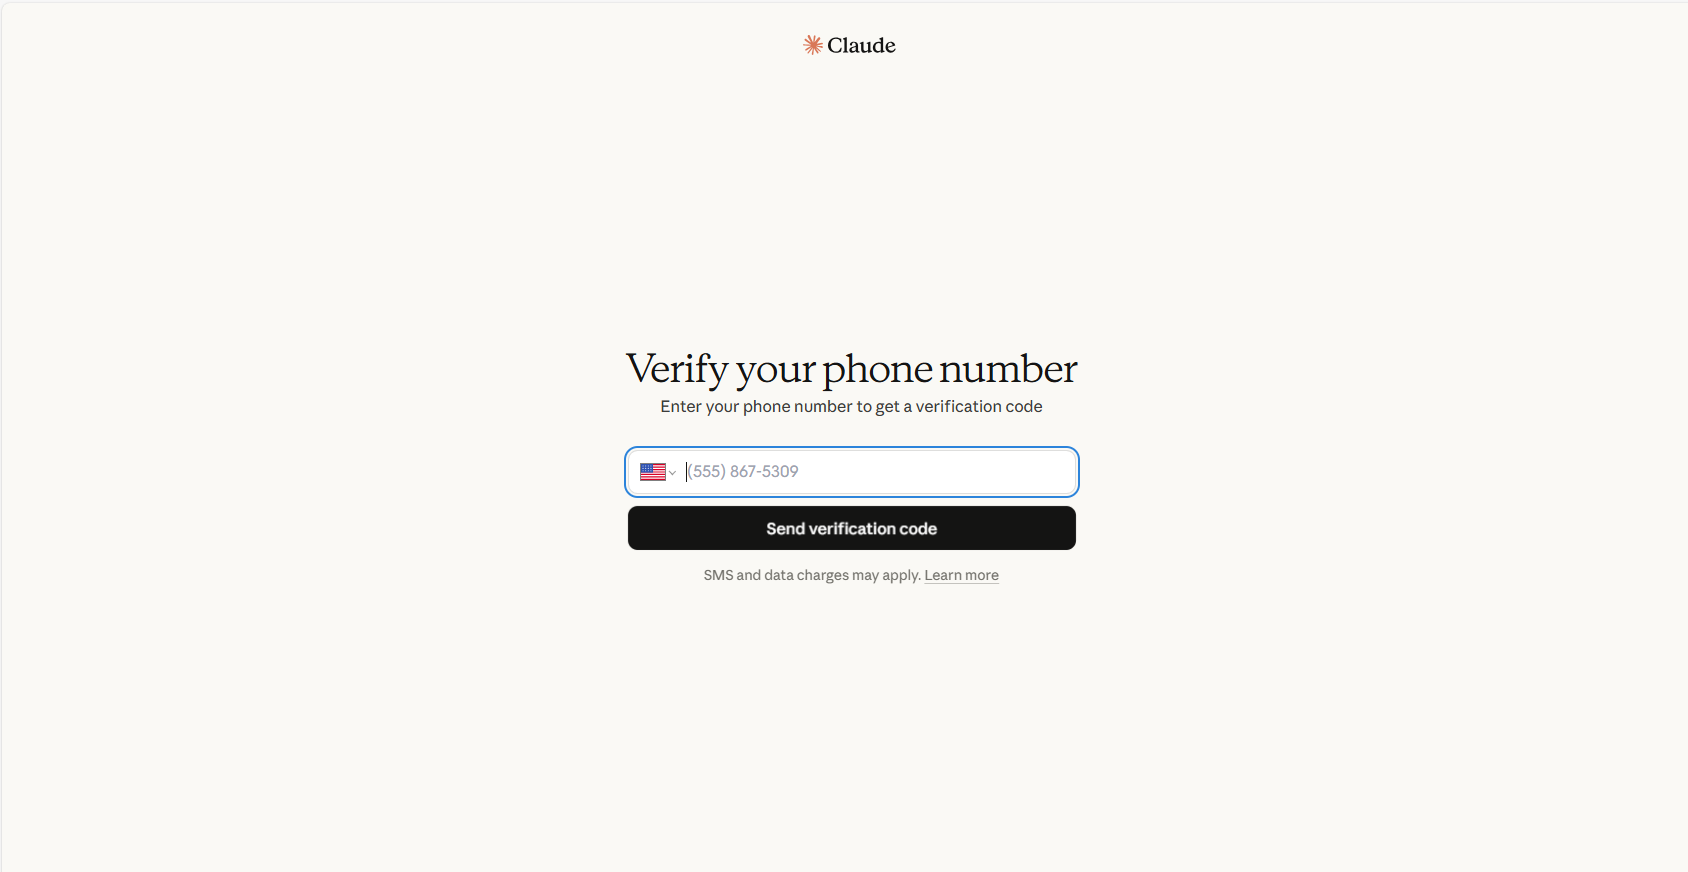
Click the flag to change your country code if needed
Type your mobile number here
Enter your mobile number to receive a verification text
Your number appears here (blurred for privacy)
Type the code from your text message here
Enter the 6-digit code sent to your phone
5
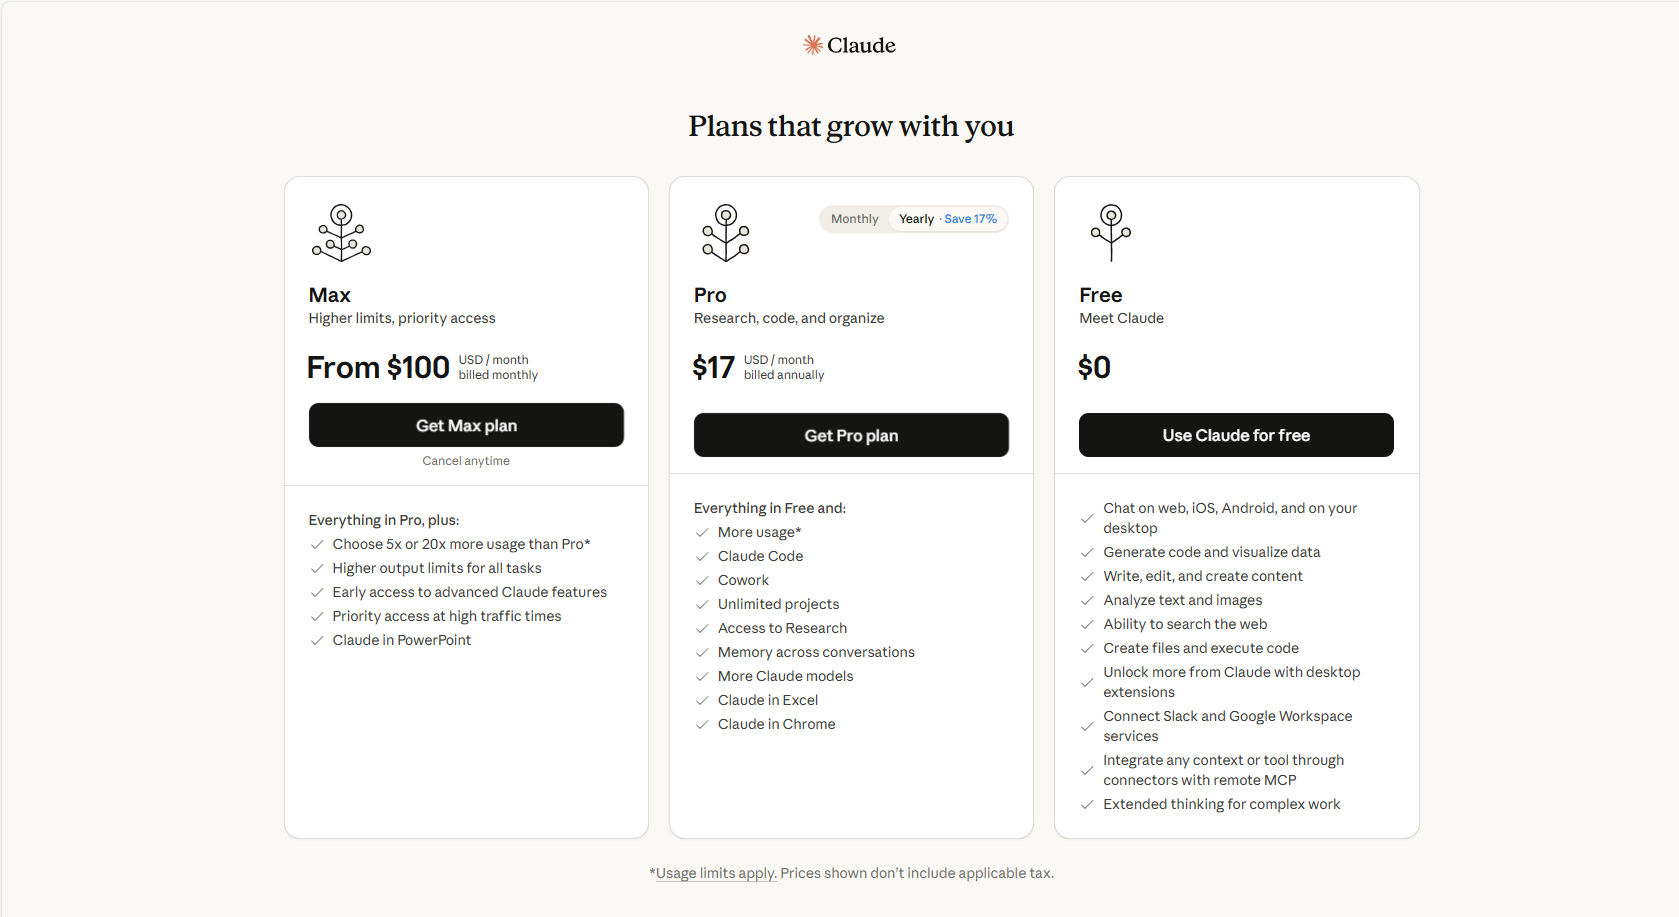
Choose your plan — select Free
You'll see a plans page with three options. Select the Free plan on the right. The free tier is everything you need for this course. You can upgrade later if you want — but it is not required.
Click here — this is all you need
Ignore — this is for advanced users
Ignore for now — not needed for this course
Choose the Free plan on the right — it's all you need to complete this course
Free vs Pro — what's the difference?
The free plan lets you have conversations with Claude and do everything in Phases 0–4 of this course. The Pro plan ($17/month) gives you more conversations per day and access to Claude Code — which you'll need for Phase 5. You don't need Pro until you reach Phase 5, so start free and upgrade only when you get there.
6
Skip the desktop app for now
You'll see a screen promoting the desktop app. Click Skip for now — you will use Claude in your browser for this course. You can always download the desktop app later.
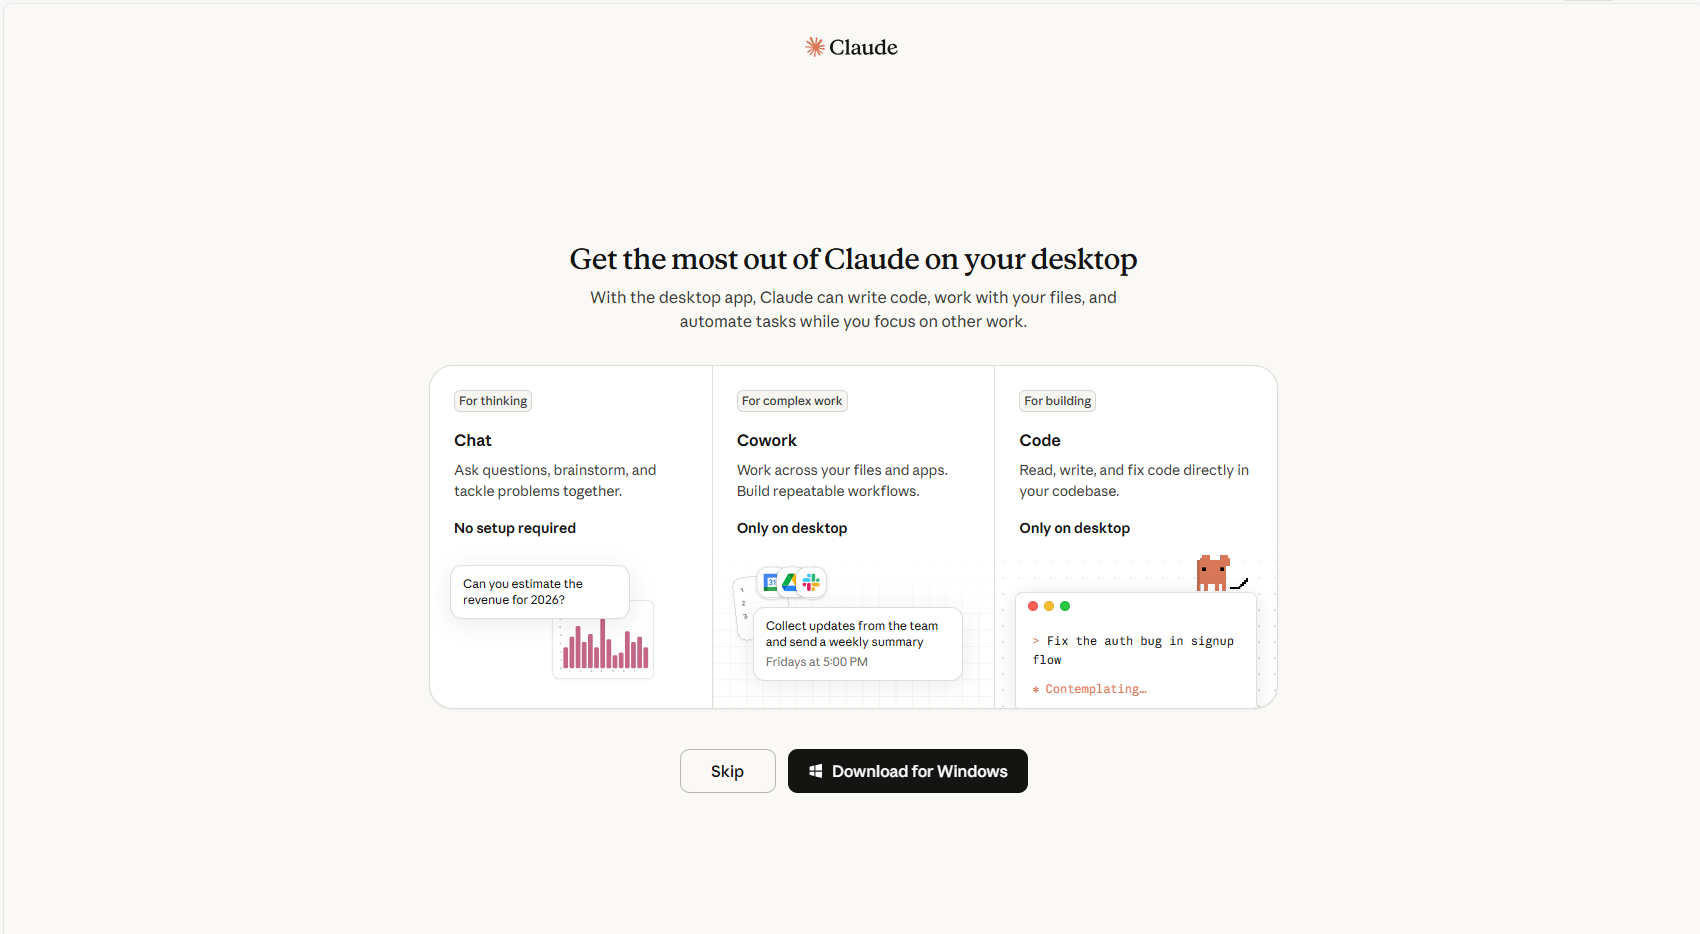
Click Skip — you don't need this now
Click Skip — the browser version is everything you need
7
Review privacy settings and continue
You'll see a "Before your first chat" screen with privacy settings. The most important one is the third toggle: "Help Claude improve" — this allows Anthropic to use your conversations for training. You can leave it on or turn it off — either is fine. Then click Continue.
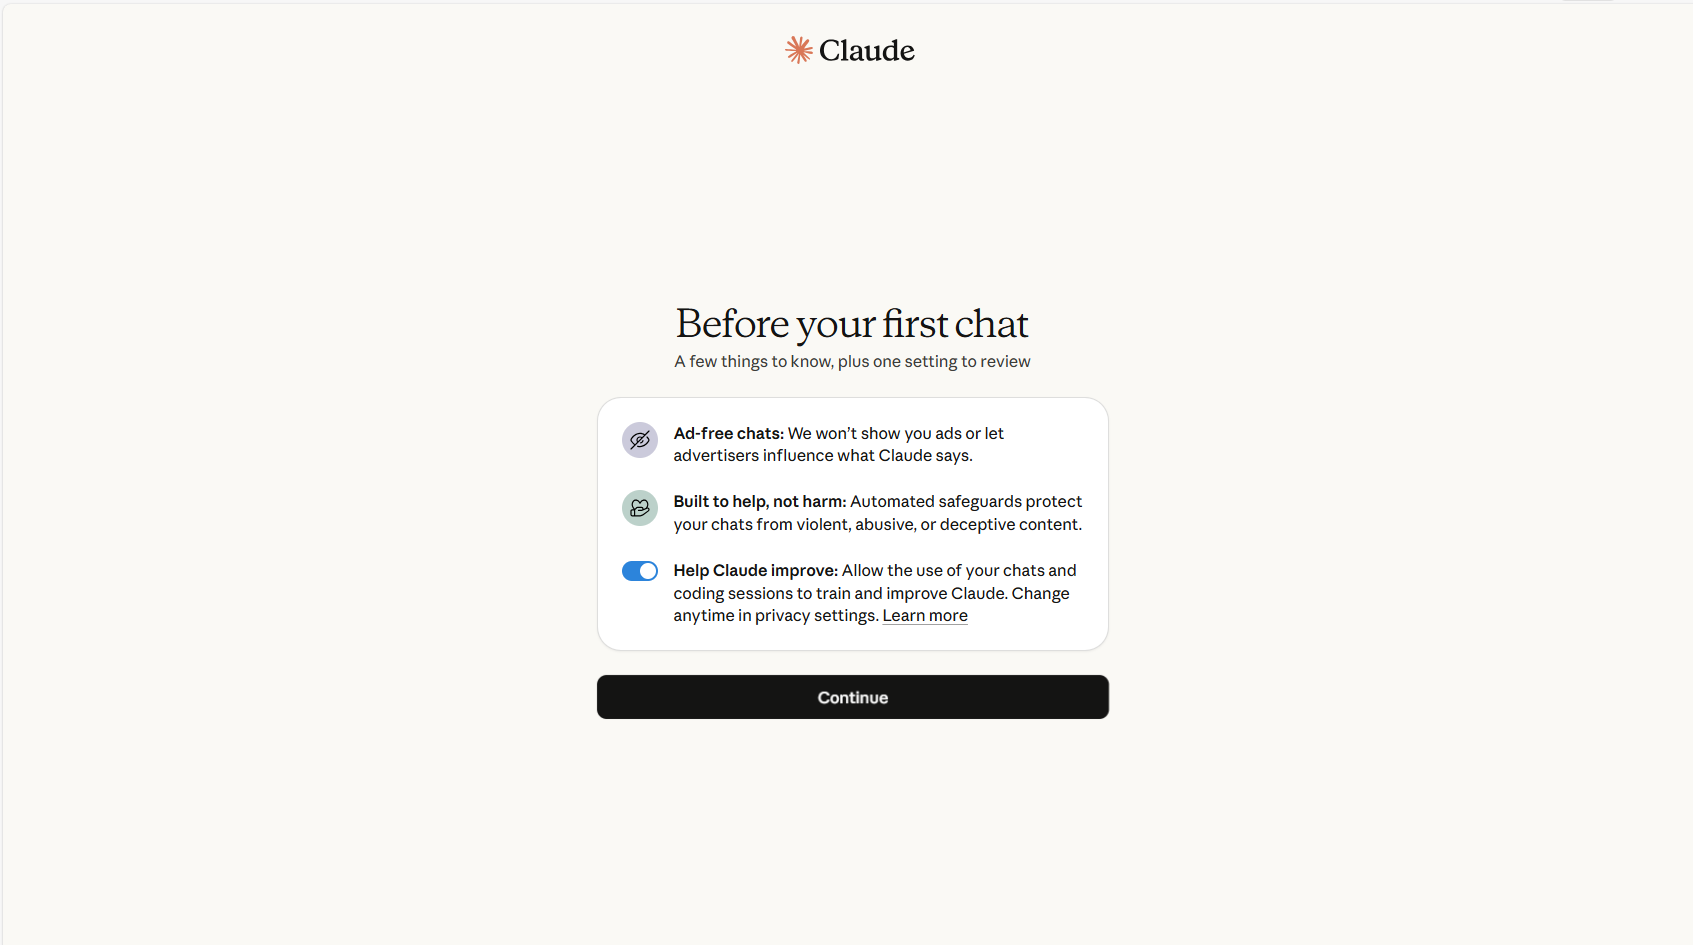
Good news — no ads, ever
Built-in safety filters
Your choice — on or off, both are fine
Click Continue when ready
Review the settings, then click Continue
8
Enter your name and pick some topics
Claude will ask what to call you — type your first name and press Enter. Then it will show you topics to explore. Pick any three that interest you and click Let's go. These are just suggestions to get you started — they don't affect anything in this course.
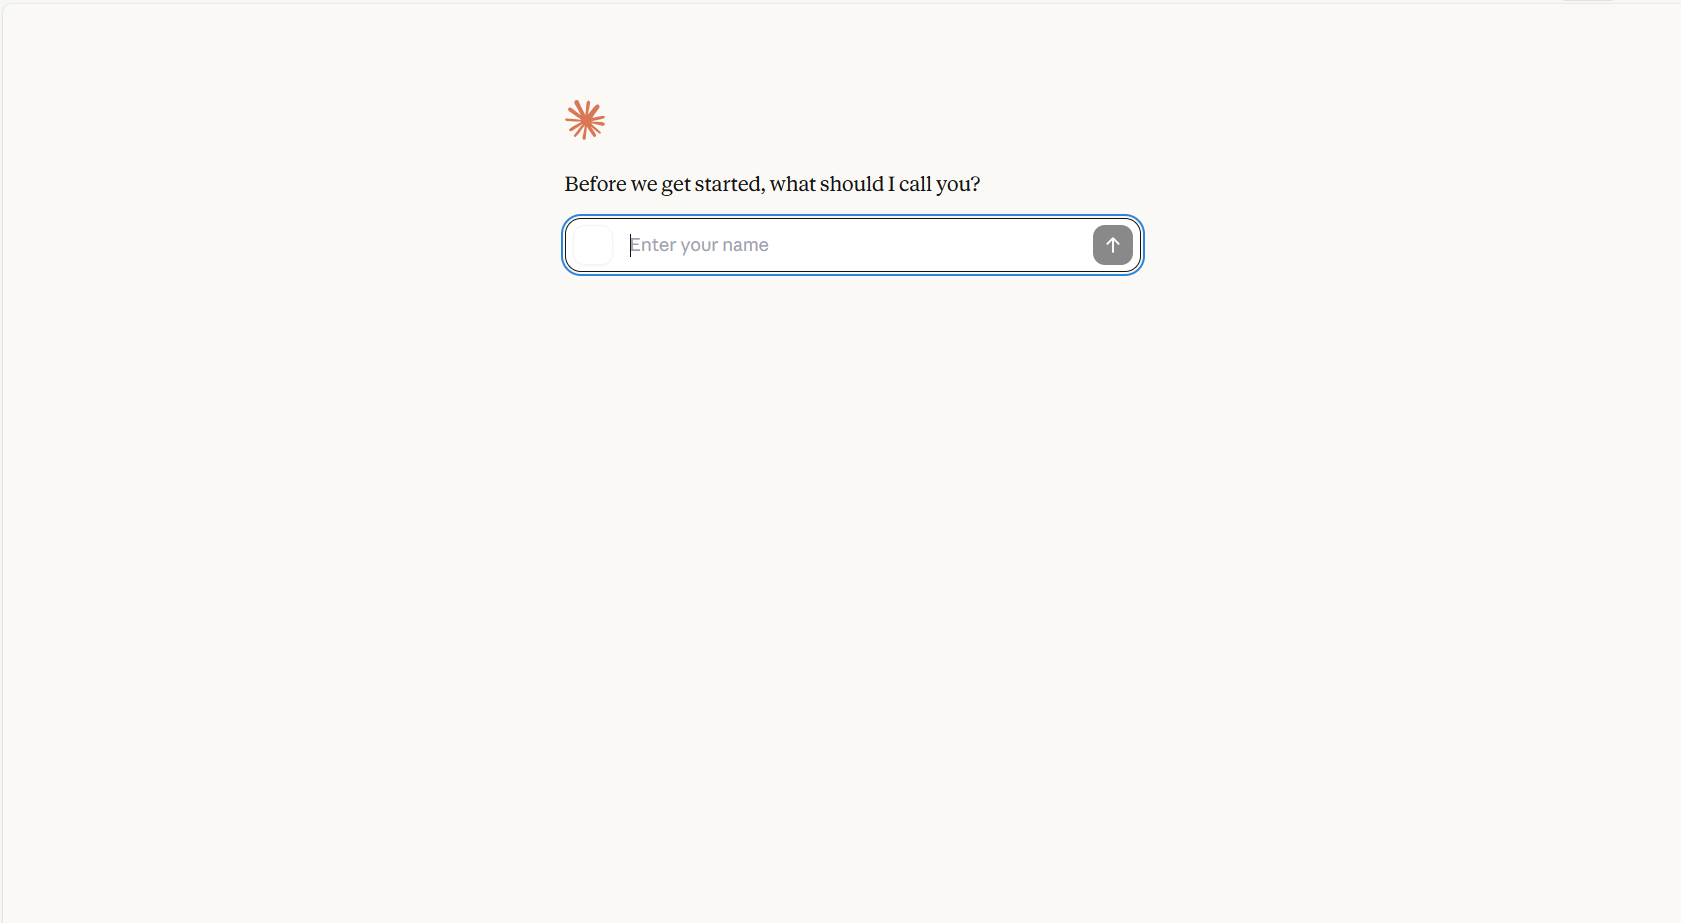
Type your first name here and press Enter
Enter your name — Claude will use it to greet you
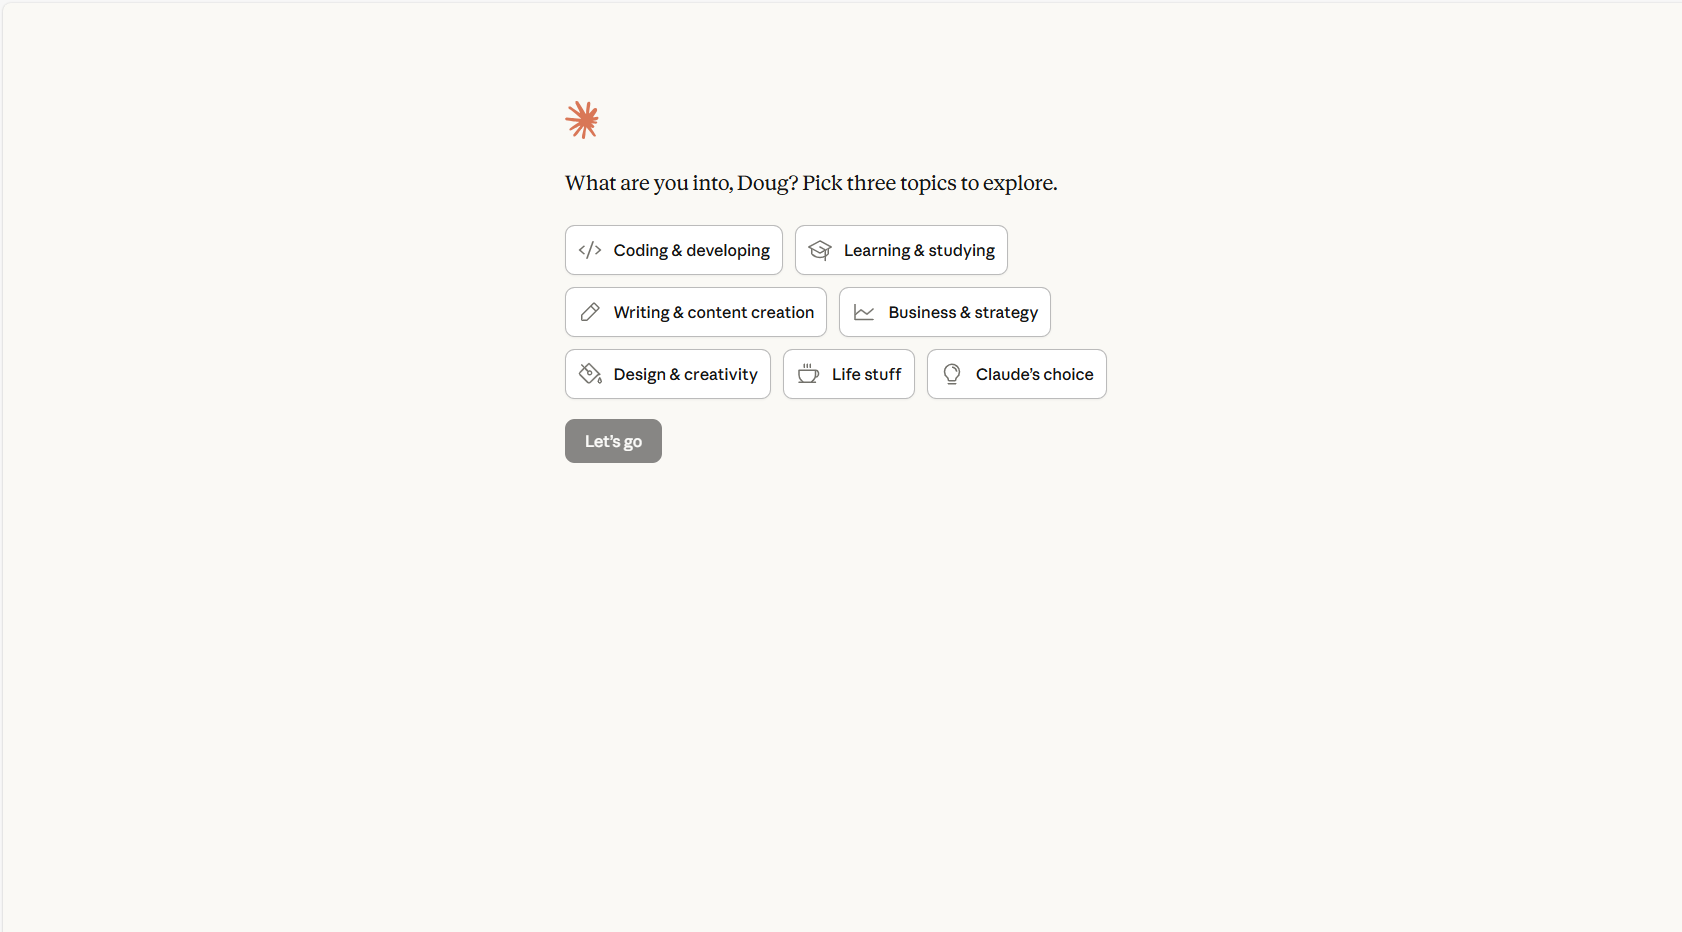
Pick any 3 — these are just suggestions
Choose any three topics that interest you, then click Let's go
9
You're in — this is your Claude interface
You will now see the main Claude interface. This is where you will spend most of your time in this course. Here is a guide to what you are looking at:
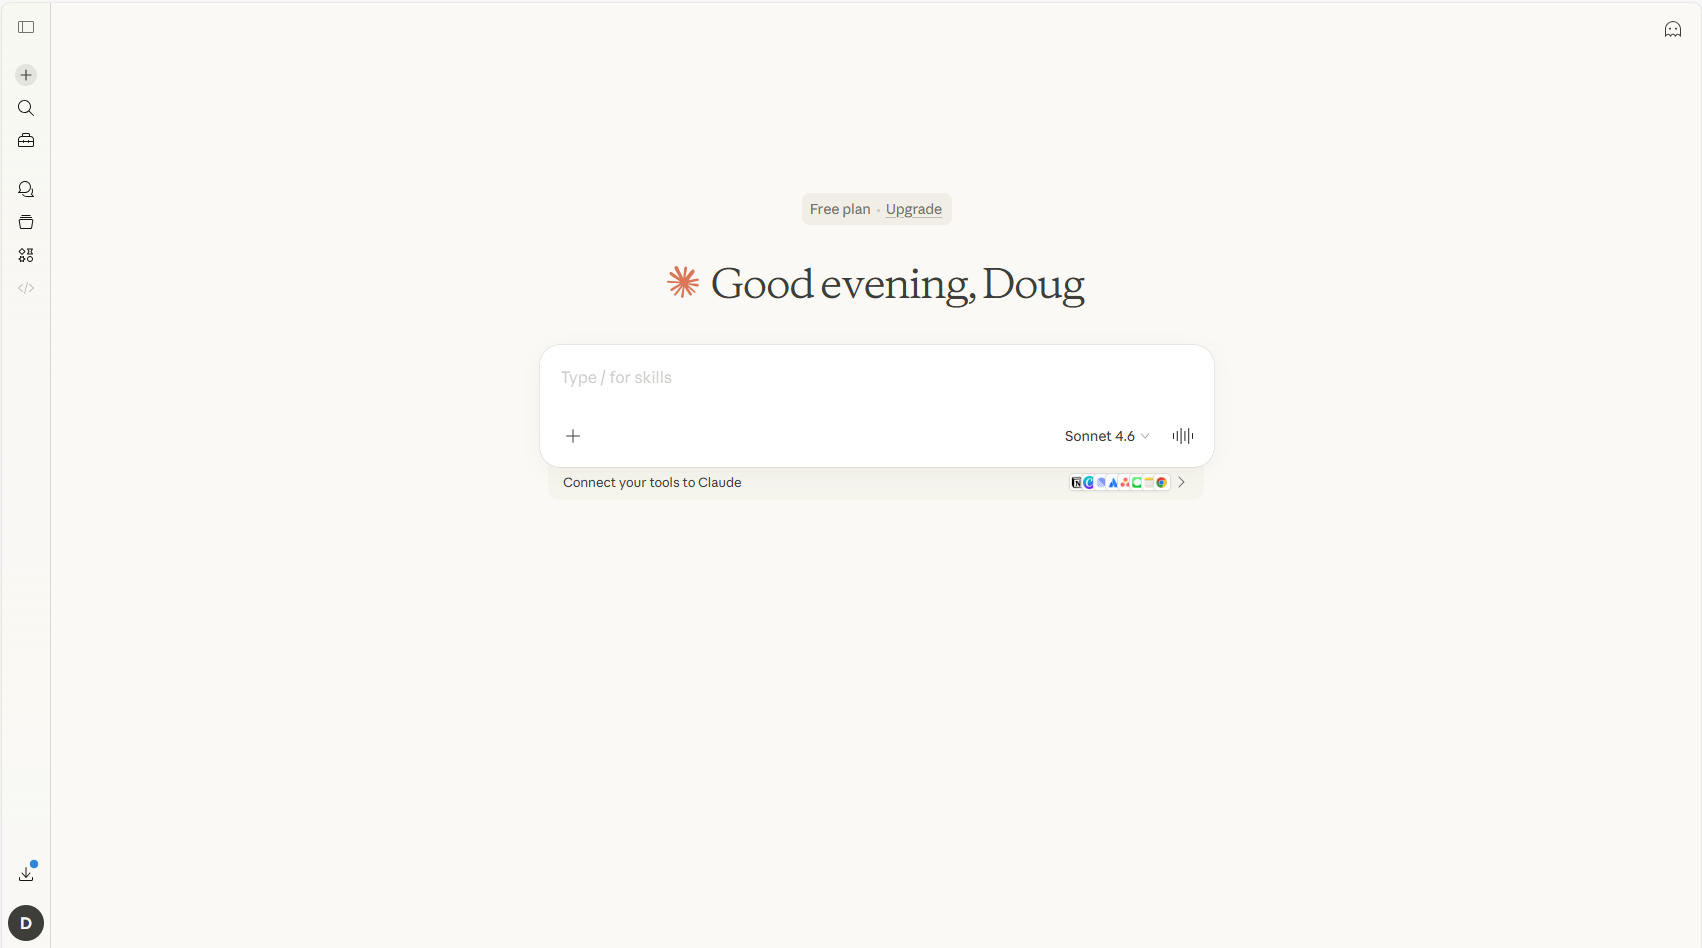
Expand/collapse the sidebar
Start a new conversation
Search past conversations
Your conversations (Chats)
Projects (explained below)
Type your message here — this is the prompt box
Model selector (explained below)
The main Claude interface — your home base for this course
★
Understanding the model selector — Opus, Sonnet, and Haiku
In the bottom right of the prompt box you will see a model name like "Sonnet 4.6". This lets you choose which version of Claude you are talking to. Think of it like choosing a car — different models for different jobs.
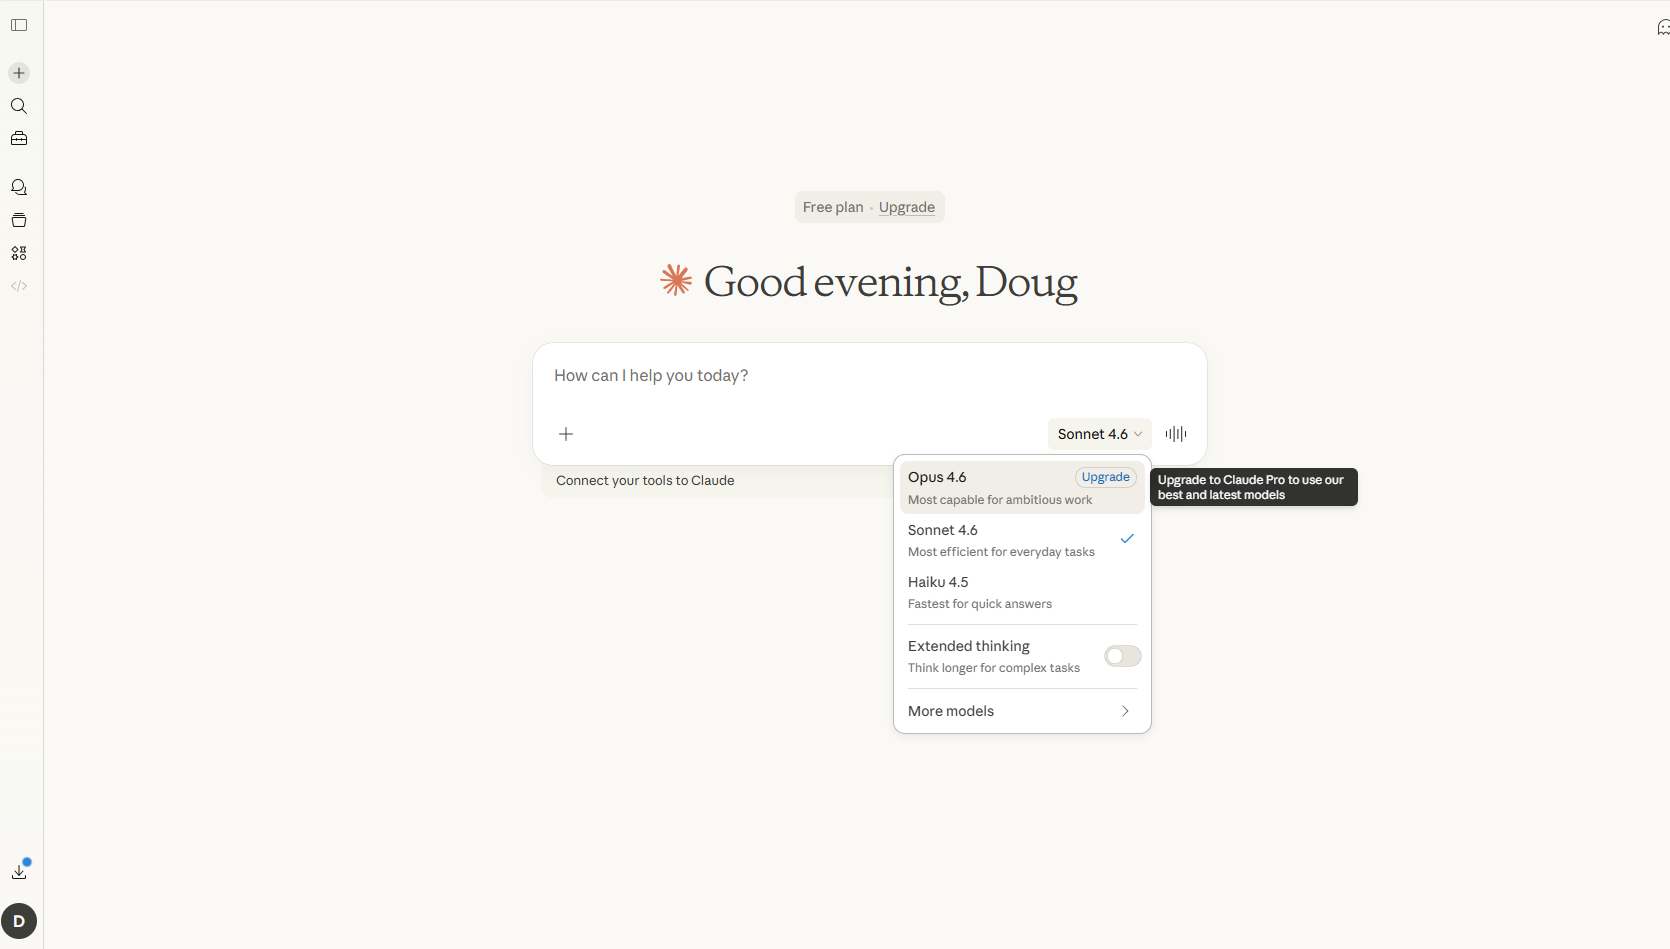
Opus — most powerful, needs Pro plan
Sonnet — best for everyday use ✓ selected
Haiku — fastest, good for quick questions
Extended thinking — Sonnet thinks longer on hard problems
Click the model name to switch between Claude versions
| Model |
Best for |
Speed |
Plan needed |
Opus 4.6
Most powerful |
Complex research, difficult reasoning, ambitious multi-step work |
Slower |
Pro or Max |
Sonnet 4.6
Best balance |
Everything in this course. Writing, analysis, exercises, building tools |
Fast |
Free & Pro |
Haiku 4.5
Fastest |
Quick questions, simple tasks, when you need an instant answer |
Fastest |
Free & Pro |
Which model should I use for this course?
Sonnet 4.6 — it's already selected by default and it's the right choice for everything in Phases 0 through 6. Leave it on Sonnet unless a lesson specifically tells you otherwise. You do not need to think about this again.
★
Understanding Chats vs Projects
Claude has two main ways to organise your conversations — Chats and Projects. Here is what each one is for:
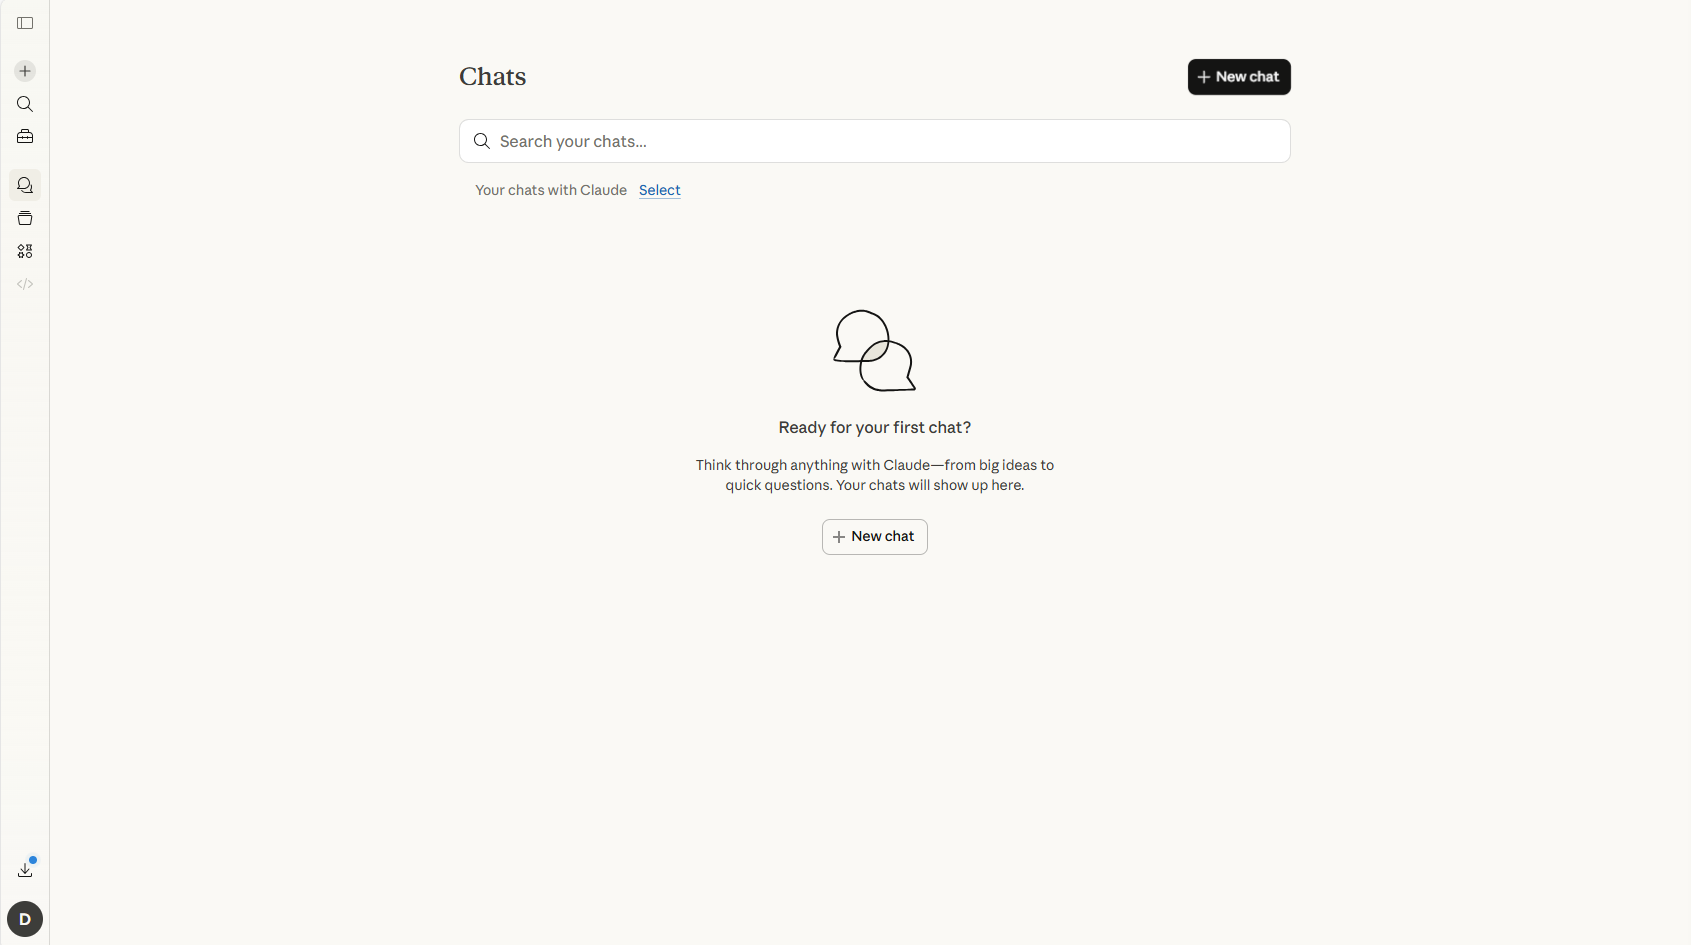
New chat button — starts a fresh conversation
Search — find any past conversation
Chats — your conversation history lives here
Your past conversations appear here as you use Claude
The Chats screen — your conversation history
💬
Chats
A single conversation with Claude. Each chat starts fresh — Claude only knows what you have told it in that specific conversation. When the conversation ends, you can start a new one.
Use for: exercises, experiments, quick tasks, learning
📁
Projects
A folder that groups related conversations together and lets you add permanent instructions and files that Claude remembers across every conversation in that project.
Use for: client work, ongoing projects, building tools
Which should I use for this course?
Chats for all the exercises in Phases 0–4 — just click the + button and start a new conversation for each exercise. Projects become relevant in Phase 5 when you start setting up professional client configurations. For now, ignore Projects completely and just use Chats.
How to start a new chat
Click the + New chat button in the top right of the Chats screen, or click the + icon in the left sidebar. This gives you a completely fresh conversation with no prior context. You will do this for every exercise in the course.
★
Pro tip: Work side-by-side with Claude open
The best way to use this course is with this page open in one window and Claude open in another — side by side. Here is how to set that up:
🪟
On Windows
1. Open this course in your browser
2. Press Windows key + Left arrow to snap it to the left half
3. Open Claude.ai in another browser window
4. Press Windows key + Right arrow to snap it to the right half
🍎
On Mac
1. Open this course in your browser
2. Hold the green fullscreen button and choose Tile Window to Left
3. Open Claude.ai in another window
4. Click it to fill the right side
You're all set up.
Your Claude account is ready. You now understand the interface, the model options, and the difference between Chats and Projects. Time to start the course.
Start Phase 0 →